One of the most important concerns for your website is making it easy to navigate. When visitors are confused or overwhelmed, the easiest choice for them is to just leave your site.
To prevent this from happening, you want to make sure your navigation menu is simple to use and not overcrowded.
If you have too many pages, your navigation menu at the top of your site can become cluttered.
When that's the case, you can actually group pages on your navigation menu by stacking them into a dropdown list.
In the above example, you can see individual pages for Books, Other Writing, and Gallery. To include all pages on the navigation menu, they have been grouped under a single header titled Works.
How to Create a Navigation Group
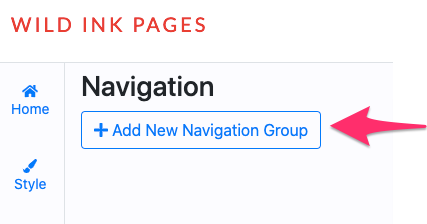
1. To open the Navigation Group section, scroll down to the Navigation tab in the editor. It sits between Products and My Settings.

2. Create your first dropdown by clicking the button "Add New Navigation Group."
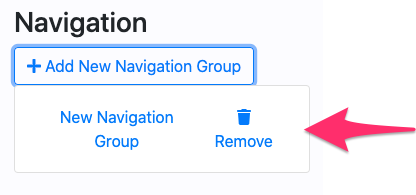
3. This will create a new dropdown, default titled as "New Navigation Group." Click the title to begin editing.
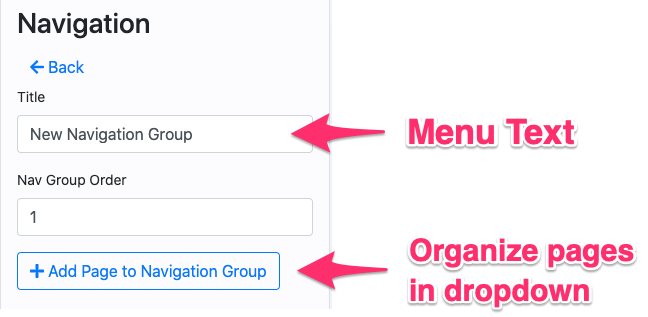
4. In the editor, first replace the temporary title with the exact text you want to appear on your main navigation menu. This text is what visitors will click on to expand the dropdown. Limit the text to 1-2 words to prevent the other menu items from feeling crowded.
5. Click "Add Page to Navigation Group" to begin selecting the pages you want to host in the dropdown menu.
Automatically, your About page will appear. This is the default.
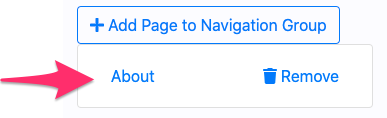
6. To select a different page for your dropdown, click on the About item. This will open the page to offer other pages to select from.
7. Click on the dropdown arrow on the right side of the Page field.
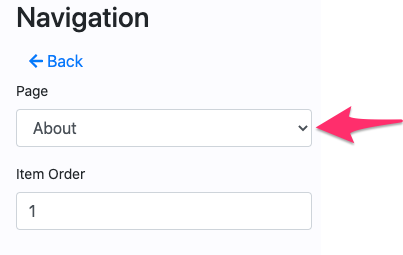
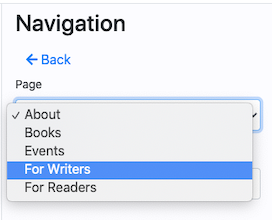
You will see a listing for each of your main content pages (About, Books, Events) and all of your custom pages.
8. Click on one page you want to include in your menu.
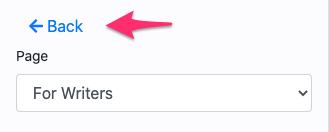
9. Click the back button to return to your navigation group.
10. Repeat steps 5-9 to add additional pages to your dropdown menu.
11. Finally, click the blue save button to publish your pages to your website.
Need help? Please email us at support@wildinkmarketing.com.